January 30, 2011

Classic Oatmeal Raisin Cookies


We all have vicious colds at my house right now. It seems to hit us around this time every year. And, if you were reading my blog last year, you might remember that I developed pneumonia and was sick for two months straight. It was a nightmare! So, this year, despite the fact that my daughter and I have both been hacking for nearly a month, and my husband (who never gets sick) caught it last week, I'm trying to stay busy, productive, and positive. I don't have a lot of energy. My house is mess. But I am trying with all my might to keep the Manriquez family happy and comfortable, making sure we keep our spirits up. We're renting funny movies and TV shows (recommendations are always welcome, by the way), and we're eating really healthy, nutritious - heavy on the leafy greenery - meals. Lots of green smoothies. Lots of jokes and laughing. I'm also taking tons of vitamins, including garlic pills, with the addition of as much fresh garlic as I can cram down my gullet. And I think it's working! The progress is very slow, but we do seem to be getting better, little by little, each day. Oh, and did I mention comfort food? Yeah, comfort food. When I am sick I am not on a diet. I do try to keep it healthy, but I like a little sweet snack in the evening when I'm convalescing. It helps with my congestion, y'see.

And that's where these cookies come in! What's so great about these is that they are crazy simple to make. Throw everything in a bucket, stir it all around, and stick 'em in the oven. Oh, and the raw dough is fantastic! About a quarter of the dough went right into my mouth uncooked, while I watched that episode of South Park where the giant guinea pigs take over the town. When I saw the guinea pig dressed as a bee, I shot a little dough out my nose. More good medicine. Because, honestly, the best medicine is laughter. I truly believe that.

1/3 cup soy or nut milk
2 tablespoons flax meal
2/3 cup brown sugar (organic preferred)
1/3 cup canola oil
1 teaspoon vanilla extract
3/4 cup all-purpose flour
1/2 teaspoon cinnamon
1/4 teaspoon nutmeg
1/4 teaspoon baking soda
1/4 teaspoon salt
1 1/2 cups old-fashioned oats
1/2 cup raisins
  • Preheat oven to 350 degrees.
  • In a large bowl, mix milk and flax seed together. 
  • Add sugar, oil, and vanilla. Mix well.
  • Add flour, cinnamon, nutmeg, baking soda, and salt. Mix well, but do not over-mix.
  • Fold in oats and raisins. 
  • Place by rounded teaspoonful, two inches apart, on a lightly greased (or sprayed) cookie sheet.
  • Bake 10 minutes.
  • Let cool on the pan for a few minutes before handling.
  • Makes about 20-ish cookies.
  • Enjoy!
I handed my daughter two cookies and said, "Give one to Daddy." But she kept them both and bit into them like they were one big cookie. And she's kind of a picky eater, so this is a definite testament to their yumminess!


I have to throw this second picture in too, because I think it's hilarious. When I look at it, I can just hear her speaking in a perfect British accent, saying something like, "The vintage of this nutmeg is just... uh, f'aw, f'aw,  f'aw... divine."


January 26, 2011

Cream Cheese Cashew Brownie Pie


Yeah, yeah, I know - it ain't exactly on my diet. But sometimes you just neeeeeed chocolate. You know what I mean? And, since I was lucky enough to find Vegan Gourmet Cream Cheese on sale at two for a dollar recently, I stocked up. Thus, cream cheese cashew brownie pie was born.
I adapted this recipe from the 'Chocolate Chip Cream Cheese Brownies' recipe in Vegan Cookies Invade Your Cookie Jar, a must-have cookbook for vegans of every culinary ilk! Grab the cupcake cookbook too - it never fails.

If you can't afford the cashews, leave them out, or feel free to use whatever nuts you have on hand.
And, if you can't afford the cream cheese, just make plain ol' brownies!
Top with blueberries, chocolate chips, powdered sugar, chocolate sauce, sifted cocoa, or nothing at all. They will taste fantastic!
Here's how to make 'em...

BROWNIES
3 ounces firm silken tofu
1/4 cup non-dairy milk
1/2 cup canola oil
2/3 cup agave nectar (or 1 cup of sugar)
2 teaspoons vanilla extract
1 cup all-purpose flour
1/2 cup unsweetened cocoa powder
1 tablespoon cornstarch
1/2 teaspoon baking powder
1/2 teaspoon salt
1/2 cup unsalted cashews, chopped

CREAM CHEESE TOPPING
8 ounces vegan cream cheese, softened
1/3 cup agave (or 1/2 cup sugar)
2 tablespoons arrowroot powder (or cornstarch)
1 tablespoon all-purpose flour
1 1/2 teaspoon vanilla extract
  • Preheat oven to 325 degrees, and lightly grease a 9-inch pie plate.
  • Make the brownie mix first. Puree tofu, milk, and oil in a blender until smooth and fluffy. Transfer tofu mixture to a mixing bowl, and add the vanilla and agave nectar. Beat or stir until smooth.  Sift in dry ingredients, then mix until smooth. Pour into pie plate and set aside.
  • If you're adding the cashews (or any nut of your choice), spread them gently on top of your brownie batter.
  • Now make the cream cheese topping. Cream together the cream cheese and agave until smooth. Add the arrowroot powder, flour, and vanilla. Beat until smooth. Gently spread over the brownie batter with a rubber spatula until brownies are covered.
  • If you are planning to sprinkle the top with chocolate chips, or more nuts, go ahead and do that now.
  • Place in the oven for 35 minutes. 
  • Allow brownies to sit on the counter until cool enough to touch. Then cover and place in refrigerator overnight. Yep, you're going to have to wait for it. I probably should have warned you about that earlier on, but it will be worth it. I promise!
  • Once cream cheese topping has set, feel free to add a light sifting of cocoa powder, fruit, powdered sugar, or anything else that suits your fancy.
  • Slice just like you would a pie.
  • Makes 8 servings.
  • Enjoy!

January 20, 2011

This Guac Rocks!

The powers-that-be over at the Wholly Guacamole company happened upon my Simple Vegan Nachos to Daiya For post and asked me if they could send some products to review. My answer?
"Well, heck yes!"

Listen, I'll admit that maybe it's not really fair for me to accept their guacamole to review because I already know that I love it. I've been eating the organic stuff for years, and I practically pee myself with glee every time I find a coupon for it. It was also one of my daughter's first baby foods! But, I am not the kind of girl who turns down free guacamole, so I let them send it to me anyway. When the package came, I didn't just get one pack of regular ol' guac. Nuh-uh. The box was filled to the brim with all kinds of neat stuff, including salsas and guacamole snack packs! Did you even know that Wholly Guacamole came in snack pack form?? I didn't. And I sure as heck didn't know they made salsa!

Here's the rundown of what I received, and my thoughts on each...

CLASSIC GUACAMOLE
The reason I started eating this particular brand of guacamole in the first place is because of the ingredient list.
Check this out:
Hass Avocados, Jalapeno Puree (white vinegar, jalapeno peppers, salt) Dehydrated Onion, Salt, Granulated Garlic.
That's it! Just normal ingredients, nothing weird, no chemicals. That was the first attraction for me, and then I tasted it... YUM! This is the closest to good, old-fashioned homemade guac I've ever eaten. And, since it uses real ingredients, it's packed with loads of vitamins and minerals. And, yes, it comes in an organic variety too!

SNACK PACKS - SPICY / CLASSIC
The snack packs are fabulous because sometimes I want some guac, but if nobody wants to share a regular-sized pack with me, I'm stuck either eating the whole thing myself (which isn't always a problem, I've been known to do it many times) or trying to store it. And, since the ingredients do not include preservatives, the guac will brown just like the regular stuff will. Now, I recently discovered that if you do not remove the unwanted portion of guac from the plastic bag and just clamp it shut with a clothespin, it will stay nice and green. So, that's one way to do it. But if I want to put it in a sack lunch, I won't have that option. So, here come the snack packs!
If you're counting calories, they're already portioned into 100 calorie packs. Guilt-free and full of vites.
WHOLLY SALSA - MILD / MEDIUM / HOT
Once again, just look at these ingredients:
Tomato, Onion, Green Bell Pepper, Cilantro, Lime Juice, Salt, Garlic, Spice, Garlic Powder
Nothing creepy, no chemicals. I love that! I really wish more companies would take the hint that we don't want foods with an ingredient list that looks like a NASA experiment.
I'm a Texan, and Texans love salsa. Most of us make our own, and I'm no different. But sometimes I need a quick batch for a party, or just a spoonful to ladle onto my tofu scramble. And that's when I turn to the store-bought stuff. I despise picante sauce, so I shy away from anything that looks watery. And, ever since my pregnancy, it is very difficult for me to look at an over-cooked green bell pepper without queasing up a bit. So, anything with little over-cooked gray squares in it, squares that were once green bell peppers, is definitely out! That lowers my choice factor quite a lot. And I have honestly never found a store-bought salsa that just blew me away... until now. This stuff is perfect for me. Yes, it has green bell peppers in it, but they are cut small enough that I don't even notice them and, on top of that, they have not been over-cooked. They're still green! Can you imagine?
The flavor is only very mildly spicy. Even the "medium" salsa was low on the spiciness scale. If you like it spicy, I recommend the hot one. I am not a fan of the spicy, so it was just right for my tastebuds.
I tried it both on Daiya quesadillas, and on plain old baked tortilla chips, and it was excellent. I now officially have a salsa that I can buy at the store and enjoy just as much as the homemade stuff!


Go HERE to register for special offers and giveaways from Wholly Guacamole.
They'll give you a coupon just for signing up!

*Please note that, while I was sent a free sample of the above-reviewed goods, I was not paid in any way, shape or form to do this review. My opinions about this product are honest. I raved about the stuff because it was legitimately tasty. And I am always happy to back a product that I really like.

January 13, 2011

Simple Mung Bean Sprouts


Can't you just sense the "healthy" in this bowl? My mom bought me a 3-tray seed sprouter for Christmas, and I've been sprouting mung beans and alfalfa seeds ever since! It's so nice to have fresh sprouts for salads and wraps, and now I'm branching out and experimenting with cooking the sprouts to add lots of crunchy nutrition to my foods.
This is a simple water-saute sprout recipe, perfect as a side to an Asian-inspired meal. Or pile it on top of rice and veggies for a complete entree! Either way, it's delicious and very healthy. Your body will thank you.
(A couple of friends hipped me to the water-saute, and it is saving me from so much fat in my meals! Thanks Molly and Katherine!) 
Give it a try...

1/4 cup water
2 cups mung bean sprouts, rinsed
2 tablespoons low-sodium soy sauce
1 tablespoon agave nectar (or preferred sweetener)
1/2 teaspoon garlic powder
Pinch of salt
Splash of sesame oil (optional)
  •  In a large skillet or saute pan, place the water and mung bean sprouts. Saute over medium-high heat, stirring constantly, for a few minutes, until sprouts begin to soften slightly.
  • Add remaining ingredients, saving sesame oil for last.
  • Continue to cook over medium heat until more than half of the liquid at the bottom of the pan has cooked off. There will be a small amount of liquid left. Do not overcook. It only takes a few minutes. You don't want soggy sprouts!
  • Cook until sprouts have softened, and soaked up some of your seasonings, but still retain their crunchy middles. Best to keep tasting them throughout the process.
  • Makes one serving.
  • Enjoy!
NUTRITION FACTS:
Calories: 142.3 / Total Fat: 1.0g / Cholesterol: 0.0mg / Sodium: 1315.2mg / Potassium: 7.7mg / Total Carbohydrate: 26.5g (Dietary Fiber: 2.1g, Sugar: 15.2g) / Protein: 2.1g
VITAMINS:
(For fun, and to prove the nutritive value of this dish, I listed vitamins too!)
Vitamin A: 4.0%, Vitamin B-6: 1.0%, Vitamin C: 20.2%, Calcium: 4.1%, Copper: 0.1%, Iron: 8.1%, Magnesium: 0.1%, Manganese: 0.2%, Phosphorous: 0.3%, Riboflavin: 0.1%, Selenium: 0.4%, Thiamin: 0.2%. Zinc: 0.1%
Look at all that Vitamin C!

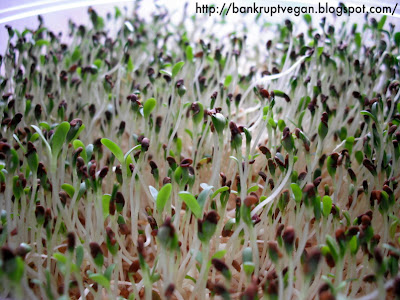
And, while I have you here, check out my little alfalfa garden. Isn't it cute? Yum!

January 10, 2011

Tofu Florentine with "Cheesy" Sauce


I wish I could take credit for this wonderful creation, but the kudos fall to Isa Chandra Moskowitz and her fabulous cookbook, Veganomicon, which I found super-cheap at Half Price Books just this past weekend! This particular creation is actually a merging of two separate recipes in the book, culled together to make a delicious brunch dish. It was so tasty and warming, with just a hint of lemon piquant. I really enjoyed it! Try it out for yourself and see what you think...

TOFU FLORENTINE
1 pound spinach (about 2 bunches), washed well and stems trimmed
1 pound firm or extra-firm tofu
Spray of olive oil, or a scant teaspoon for oiling pan
1/4 cup water
2 cloves garlic, minced
3 tablespoons fresh lemon juice
2 tablespoons soy sauce
1 chopped tomato, for garnish
  • Preheat oven to broil.
  • Cut tofu into triangles, like so: Slice widthwise into four equal slices. Cut each of those slices in half, widthwise, so that you have eight squares. Lastly, cut each of those squares in half diagonally to make sixteen triangles.
  • Mix all the ingredients for the braising sauce together in a small bowl.
  • When the broiler is good and hot, spray a thing layer of olive oil on the bottom of an oven-safe pan or small rimmed baking sheet. If you don't have a spray bottle of oil, then just use a paper towel to spread a very thin coating of oil in the pan. 
  • Dip each piece of tofu in the braising liquid and place in the pan. Put the pan in the broiler and cook for about 10 minutes, until the tofu is lightly browned. Remove the pan and pour a few spoonfuls of braising liquid over the tofu (no need to turn it). Put back in the oven for 3 more minutes, then repeat with the remaining braising liquid. Cook for about 3 more minutes - at this point tofu should be golden brown. Remove from the oven.
  • While the tofu is broiling for the first 10 minutes, prepare the spinach: Preheat a large pan over medium-high heat. While the spinach is still wet from being washed, add half to the pan. The extra moisture helps steam the spinach. Use tongs to toss it around. Once it is wilted, add another batch of spinach. After all the spinach is cooked, cover to keep warm.
CHEESY SAUCE
2 cups vegetable broth or water
1/4 cup all-purpose flour
1 tablespoon olive oil (*I left this out and used water to saute instead.)
3 cloves garlic, minced
Pinch of dried thyme
1/4 teaspoon salt
Several pinches ground black pepper
1/8 teaspoon turmeric
3/4 cup nutritional yeast
1 tablespoon fresh lemon juice
1 teaspoon prepared yellow mustard
  • Combine the broth and flour in a measuring cup and whisk with a fork until dissolved.
  • Preheat a small saucepan over medium-low heat. Place the oil (*or water) in the pan and gently cook for about 2 minutes, stirring often and being careful not to burn the garlic.
  • Add the thyme, salt, and pepper, and cook for about 15 seconds. Add the broth, turmeric, and nutritional yeast, and raise the heat to medium. Use a whisk to stir constantly. The mixture should start bubbling and thickening in about 3 minutes; if it doesn't, turn the heat a bit higher.
  • Once the mixture is bubbling and thickening, stir and cook for about 2 more minutes. Add the lemon juice and mustard. The mixture should resemble a thick, melty cheese. 
TO SERVE:
Lay the tofu triangles side by side, in an alternating pattern (That's my idea! I just thought it was cute.) Cover with a half cup of spinach, or more if you like. Drizzle cheesy sauce, to taste. Top with tomatoes. Enjoy!

January 6, 2011

Simple Vegan Nachos to Daiya For!


I know, I know... We 'Bankrupt Vegans' can't afford Daiya cheese. And that hasn't changed. Daiya is expensive! Before today, I had never tried it. But, you will flip when I tell you that I found full-size bags of Daiya cheddar at the salvage store two days ago for one dollar each. One dollar! I bought ten bags! And I'm really glad I did because I fell in love with it at first bite.
Since that purchase, I have played with it non-stop. I've made no-turkey melts, chik'n nachos, and these delicious simple nachos that were soo, sooooo good. Now you might be saying, "Well, Jen, how on earth did you afford that fancy guacamole?" I'll tell ya! A few days ago, Kroger had organic Wholly Guacamole packs (normally around 5 dollars apiece) on a "Buy One, Get One Free" sale, and I had two different coupons for a dollar off, which I stacked to get two Wholly Guacamoles for only 3 bucks! Yep, we are livin' large at the Bankrupt Vegan house right now!
Make these super-easy nachos and see what I mean...

14 Baked Tostito's Scoops
1 white mushroom cap, sliced in thick pieces
1/4 cup Daiya cheddar
1/4 cup homemade or store-bought guacamole

  • Preheat oven to 350 degrees.
  • Put your Tostito's Scoops on a plate.
  • Fill each Scoop evenly with Daiya cheddar. A little goes a long way, trust me!
  • Put a slice of mushroom into each scoop, on top of the cheese.
  • Bake for about five minutes, until the mushroom cap is nicely cooked and the cheese is melted.
  • Remove from oven, and put a little pinch of guacamole into each Scoop.
  • Makes one serving. 
  • This is, obviously, a very versatile and easy recipe. To liven it up, add Gardein chick'n pieces, LightLife Mexican style crumbles, roasted veggies, pico de gallo, or just about anything else.
  • Enjoy!
NUTRITION FACTS (one serving):
Calories: 394 / Total Fat: 24.1g (Saturated Fat: 5.5g, Polyunsaturated Fat: 1.5g, Monounsaturated Fat: 1.0g) / Cholesterol: 0mg / Sodium: 615.7mg / Potassium: 56.5mg / Total Carbohydrate: 38.6g (Dietary Fiber: 9.2g, Sugar: 0.3g) / Protein: 6.6g

January 4, 2011

Guilt-Free Hot Cocoa


It's not unusual, at this time of year, to find me on my predictable "new year's resolution diet." Let's just hope I manage to make it stick this time! In an effort to quell my chocolate cravings without breaking the calorie bank, I started fiddling around in my kitchen to create a diet version of my favorite hot cocoa recipe, and I think I've done it! It's not as creamy or as rich as your standard hot cocoa, but the chocolate hits that part of my brain that cries out for it, and I feel satisfied without chomping into a bar of candy.
I also got lucky and found a grocery store that allows you to stack coupons from different manufacturers. I had four $1.00 off coupons for Truvia, all from different vendors, so I was able to get one of those big jugs of the loose stuff for only a couple of bucks. Whoopee!
Try this out if you're on a diet. I think you'll like it! Here's how to make it...

1/8 cup (3 tablespoons) water
2 tablespoons unsweetened cocoa powder (Fair Trade preferred)
1 tablespoons non-caloric sweetener (I used Truvia)
1 cup light soy or nut milk (I used plain Silk Light)
1 teaspoon vanilla extract
  • In a small sauce pan, whisk together the water, cocoa and sweetener until no lumps remain.
  • Add soy milk and vanilla, and whisk again until well-blended.
  • Heat on medium-high until just about to boil.
  • Pour into your favorite mug and settle in for a guiltless chocolate treat.
  • Makes one serving.
  • Enjoy!
NUTRITION FACTS:
Calories: 106.8 / Total Fat: 3.5g (Saturated Fat: 0.9g, Polyunsaturated Fat: 1.0g, Monounsaturated Fat: 1.0g) / Cholesterol: 0.0mg / Sodium: 122.6mg / Potassium: 470.8mg / Total Carbohydrate: 17.4g (Dietary Fiber: 4.6g, Sugar: 6.7g) / Protein: 8.1g