Showing posts with label cooking with kids. Show all posts

April 3, 2017

Quick and Easy Tropical Sorbet


The story behind this homemade sorbet is fresh in my memory because:
a) it's short, and
b) it literally just happened twenty minutes ago.

My daughter was coming into the house, after playing outside for a while, and she banged her top lip on the metal door, giving it a little scrape and making it swell up. So, I told her I'd make her something cold to help the swelling go down. I thought I would whip up a smoothie real quick, but my blender was in the dishwasher getting hosed down. However, my food processor was clean and available! So, I swirled together a bunch of stuff that I found in my freezer and fridge and made a sorbet, not certain how it was going to turn out. But you know what? IT WAS DELICIOUS! I thought I'd hop onto the blog and share it with you guys before I forgot what I put in it - it's perfect for a cooling spring and summer pick-me-up. I put the leftover sorbet in popsicle molds. Can't wait to try those too!

This makes a lot, so halve the amounts if you don't want more sorbet than two to four people can eat in one sitting. Also, I'm just kind of memory-eyeballing the amounts here. I did not measure this. I just tossed stuff into the food processor and hoped for the best. It's just how I like to live my life.

1 cup frozen pineapple chunks
1 cup frozen peach slices
1 cup frozen nectarine slices
1 cup frozen strawberries
1 cup frozen mango chunks
1 cup ruby red grapefruit juice
3 tablespoons agave or maple syrup, or more to taste
1/2 - 1 cup non-dairy milk, to taste

  • Put everything except the milk into a large (I think mine is a 4-quart) food processor and start spinning on high. Gradually drizzle in the milk, just a few tablespoons at a time, to thin out the mixture to your desired consistency. 
  • Serve it up and enjoy!

October 3, 2016

Banana Walnut (or Choc Chip) Muffins


I'm sorry I haven't posted in a while, but I've started homeschooling my kiddo  and that is keeping me very busy! Gone are the days of solitude where I can clean house for a while and then cook and blog while the washer is running. But, that's okay, I love homeschooling and so does my daughter! But I'll still post when I can. In the meantime, I picked up a new-to-me cookbook called The 30-Day Vegan Challenge by Colleen Patrick-Goudreau (whose podcast, Joyful Vegan, is fantastic!) and I'm so excited about it that I wanted to share the first recipe I made from the book.

My daughter is 8-years-old and is obstinate about vegan food. Sorry, "vegangelicals," but she is very adamant that she does not want to eat vegan food and while I frequently encourage her to try it, I do not force her to eat only vegan. But, I am a sneaky redhead, so here's what I've been doing - I've been making vegan recipes and not telling her they're vegan and keeping tabs on the ones she really likes. So far, I've only been able to trick her with my three-bean chili. I use the Trader Joe's vegan ground beef substitute and she honestly hasn't noticed that it's not beef. Now, the reason I'm so excited about Ms. Patrick-Goudreau's cookbook is because it has lots of yummy-looking "kid food" in it, like mac and cheese, chocolate cake, and quesadillas, and when I showed my daughter the photos in the book she said, "Mmmm, that looks good! Get this cookbook." I never told her it was a vegan cookbook. I'll keep you posted on how she responds to the recipes.


This is the recipe for Banana Chocolate Chip Muffins, but I didn't have any chocolate chips, so I subbed chopped walnuts instead.

2 cups whole wheat pastry flour or unbleached all-purpose flour
1 1/2 teaspoons baking soda
1/2 teaspoon salt
1 cup granulated sugar
1/3 cup canola oil
4 ripe bananas, mashed
1/4 cup water
1 teaspoon vanilla extract
1 cup semisweet chocolate chips (or chopped walnuts)
  • Preheat oven to 350 degrees.
  • In a medium-sized bowl, mix together flour, baking soda, and salt. Set aside.
  • In a large bowl or stand-mixer, beat oil and sugar together. 
  • Add mashed bananas and mix.
  • Add water and vanilla. Mix again.
  • Use a spoon to gently stir the flour mixture into the wet mixture.
  • Fold in chocolate chips or walnuts.
  • Fill each muffin tin halfway with batter. (With the use of the Reusable Silicone Baking Cup Liners, I was able to get 20 muffins out of this batch.)
  • Bake for 20 - 30 minutes, until a toothpick inserted in a center muffin comes out clean.
  • Enjoy!

July 2, 2016

Vegan 'Puppy Chow'


Super easy to make, cheap, and delicious. Plus, it makes a ton! You can't go wrong with this stuff. It's a finger food, it's a kid food, it's an ice cream topping, it's a popcorn add-in, it's a pretzel mate, it's everything you dream of and more. There's no baking involved so feel free to let your kiddos get in on the preparation.

Here's what you'll need:

1 cup vegan semi-sweet chocolate chips
1/2 cup nut or seed butter of choice (I used sunflower seed butter)
1/4 cup vegan butter
1 12.8-ounce box of rice chex or crispix-style cereal
1 cup powdered sugar
  • In a double boiler, or in a metal or ceramic bowl placed over an inch or so of water, melt the chocolate chips, nut or seed butter, and vegan butter. Stir gently until smooth and well-mixed. 
  • Pour over cereal and gently stir, folding chocolate into the cereal, coating each piece. If you have a large Tupperware container with a tight-fitting lid, you can gently shake the mixture until everything is evenly coated. 
  • Once the chocolate has cooled slightly, go ahead and toss in the powdered sugar. Gently stir or shake again.
  • That's all there is to it. Enjoy!
P.S. We're experimenting with a hybrid of the gluten-free and Feingold diets to try to curb my daughter's ADHD symptoms before school starts back up. So, you'll be seeing lots and lots of gluten-free and low-salicylate recipes over the summer. If it works, you'll be seeing them indefinitely! Wish us luck. 

March 4, 2016

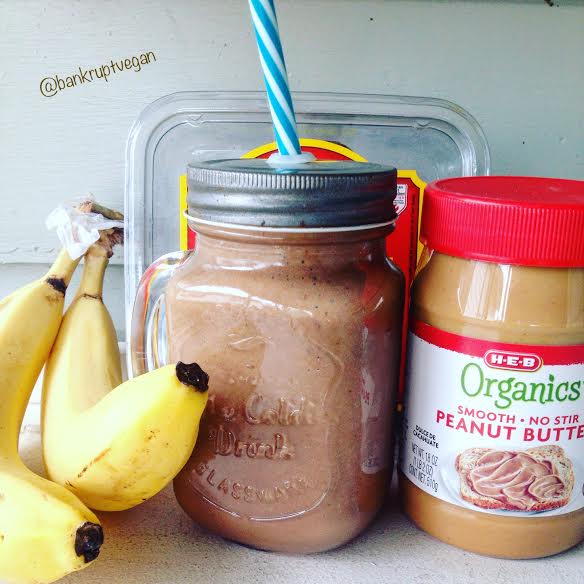
Chocolate Banana Peanut Butter Shake


It's already getting steamy in the great state of Texas. I started pumping the AC somewhere around mid-February, which means it's finally time for some cold drinks up in here! Enter this bad boy, the one containing the holy trinity of sweet flavors - chocolate, peanut butter, and bananas. Woot woot! Try it. You'll never be the same, friend.

2 ripe bananas
4 dates, pitted*
1 cup non-dairy milk
4 tablespoons smooth peanut butter
2 tablespoon cocoa powder
10 ice cubes, or more to taste

*Sometimes you can find dates at a decent price (Trader Joe's has them pretty cheap) and sometimes you can't. If your budget doesn't allow for dates, replace them with a liquid sweetener, like agave or maple syrup, about a teaspoon of sweetener for each date. Or just leave the sweet stuff out altogether! If your banana is ripe and your peanut butter has sweetener in it, you may not need extra sweetener at all. But if you can swing the dates, I highly recommend them. They add a lovely touch of natural sweetness to this drink. Some rum would be nice too...

  • Place bananas, dates (or liquid sweetener), milk, peanut butter, and cocoa powder into the blender and blend until nice and smooth. 
  • Add ice cubes, a few at a time, until cubes are crushed and drink is chilled.
  • Makes one large glass (think Mason jar) or two smaller glasses.
  • Enjoy!

November 3, 2015

Banana-Pecan Muffins


I hope everyone had a fabulous Halloween! We tried the "Switch Witch" thing for the first time this year. My daughter was able to go out and trick-or-treat like everyone else, but at the end of the night she left her candy out for Switch Witch, who swooped in while she was sleeping, took her garbage candy ("to feed to her naughty cat") and left, in it's place, good quality candy that I don't have to worry about her eating. No dyes, no preservatives, etc. It worked like a charm and my kiddo didn't have to feel left out of the Halloween festivities! The junk candy went to work with my husband who left it out in the breakroom for his co-workers. 

The morning after Halloween I made these fantastic muffins because I wanted to use the tons of pecans falling from the tree in my front yard right now! I seriously have three buckets full of pecans and at least three or four dozen more pecans fall from the tree every day. I love pecans, so I'm in heaven! I can't wait to make pies. If you don't have pecans, or they are too expensive, any nut will do. Or you can replace the nuts in the streusel topping with oatmeal, which is super cheap. Feel free to be creative!

Also, my daughter (who is a really picky eater) absolutely LOVED these! She ate two for breakfast, then came home after school and ate four more. If you have kids, you might want to make a double batch.

1 1/2 cups non-dairy milk (I used unsweetened almond)
2 teaspoons apple cider vinegar
2 2/3 cups flour (I used white whole-wheat)
1 1/2 teaspoons baking powder
1/2 teaspoon baking soda
3/4 teaspoon salt
2 teaspoons cinnamon
1/3 cup vegan butter, softened
3/4 cup granulated sugar (organic preferred)
1/4 cup vegan yogurt (I used unsweetened coconut yogurt)
1 teaspoon vanilla extract
2 large overripe bananas, mashed
1 cup pecan pieces
1/2 cup brown sugar (organic preferred)
  • Preheat oven to 325 degrees. Grease a 12-muffin tin or place paper liners in it.
  • In a small bowl, whisk the milk and vinegar together and set aside to allow it to curdle.
  • Beat butter and sugar together until light and fluffy, about two minutes or so. 
  • Add yogurt, milk and vinegar mixture, and vanilla. Mix well. 
  • Add bananas and mix again.
  • On top of your soft mix, dump the dry ingredients. Flour, baking powder, baking soda, salt and cinnamon. Then stir with a spoon or beat gently until well-incorporated, but take care not to overmix or your muffins will be tough.
  • Spoon the batter into your muffin tin, filling each cup almost to the top. I did two scoops into each cup with a large cookie scoop, and that worked perfectly. 
  • In a separate bowl, mix your nuts or oats with the brown sugar and spoon it onto the tops of your muffins. 
  • Bake for 15 to 20 minutes, or until a toothpick inserted into the center of a muffin comes out clean.
  • Enjoy!

October 12, 2015

Fresh No-Cook Spaghetti Sauce


In the mood for something fresh, light, easy and breezy? You have to try this amazing, no-cook spaghetti sauce! A few days ago, a friend of a friend on Facebook posted a video from Food & Wine magazine that I saved immediately because I just knew I had to try it. You just use a box grater to grate tomatoes into a bowl, add a few other ingredients, mix it with cooked pasta and you're good to go. I thought it must be too good to be true, but I tried it for dinner tonight and I'll be danged if it isn't delicious! Here's the video:


And here's my take on it:


16 ounces spaghetti noodles, cooked
6 to 8 large, ripe beefsteak tomatoes, cut in half
3 tablespoons olive oil (optional)
1/2 to 1 teaspoon salt, to taste
1/2 to 1 teaspoon garlic powder, to taste
1 teaspoon dried oregano
Handful fresh basil leaves, chopped


  • Grate the tomatoes into a large bowl with a box grater.
  • Add remaining ingredients, to taste, and stir. 
  • Toss with your spaghetti and serve.
  • Seriously, it's that freakin' easy.
  • Enjoy!


December 9, 2014

Autumn's Easiest Dried Apples


I know I'm a little late with this post. I actually made these dried apples and took this picture well over a month ago, but it's been busy around here. I vow, right now, to get back to posting more regularly! Now that I am jobless I seriously have no excuse. But I'm one of those moderately crazy OCD people who think they can accomplish nothing creative until their house is clean. So, I end up cleaning constantly, and never writing or exercising or anything else useful until my house is clean, which it never is, so you get my drift... My new year's resolution is going to be to let the house be messy and get my creative stuff done first! As I type, there are muddy dog prints on the carpet in the back room and a pile of dishes in the kitchen sink. I can't let those things haunt me. Let's get to the apples!

For this recipe you will need a dehydrator, and it does not have to be a fancy one. The dehydrator I used cost $20 (I got it at Aldi last summer) and it works great! And you don't have to have an apple peeler/corer combo, but it saves you an hour or more of peeling and chopping and helps to make sure all of your apples are the same thickness. I'm talking about one of these things...
(Affiliate link- Click the photo to be taken to the product.)


I recommend a stout, cast-iron body corer with a clamp (like in the picture) as opposed to a suction cup. Again, these run about $20.

Use a nice sweet, or tart, apple. I like to use Pink Lady apples. A Red Delicious, for example, might not make for a very flavorful chip. But a Jazz or Granny Smith would make a yummy chip for sure!

So basically, you just twirl your apple through this contraption and it takes the skin off (drying the skin makes it too chewy - trust me and take it off), cores the apple and spiral slices it all at the same time. What you have left is just the good "apple meat." Take a knife and slice it just once from top to bottom, which will leave you with a lovely stack of evenly sliced apple chips. Lay each chip in a single layer in your dehydrator. The sides can be touching, but it is very important that the apples not overlap one another.

If you're wondering about browning, don't worry. The first time I tried this, I was very concerned about whether or not I needed to dip my apples into a lemon juice solution (or something similar), but I read online that it wasn't necessary and I went for it. The apples you see in the photo have not been treated, or flavored, with anything. I just popped the raw apple slices right into the dehydrator and that was it.

Once your apples are set, turn on your dehydrator (mine does not have any particular settings, just a plug that turns it on and off) and let those babies crisp up over a twenty-four hour period, give or take a few hours depending on your machine. Rotate the layers every couple of hours or so. Make sure the apples are totally dry. If you take them out too soon and don't eat them right away they will spoil quickly.

Once they're done, allow them to cool at room temperature before storing them in an airtight container. Then enjoy! They are delicious and nutritious - and a perfect compliment to movie night.

September 16, 2014

Christine's Premium Motor Oil


Christine's Premium Motor Oil tastes oddly like chocolate syrup...

There are those perfect vegans in the world whose taste buds are so pure, unadulterated and refined that they claim to never crave any unhealthy foods. They might say, for instance, "I used to Jones for ice cream 24/7, but now all I ever want is kale." To this I say both Piff and Twaddle. C'mon, guys. Are you seriously telling me that you never crave slumber party food? Like, never?! 


Well, the opposite of that is me - I am a junk food enthusiast who could live on homemade popcorn drenched in vegan butter and nooch, and who loves to bake bake bake! Yes, I do try to control my intake of junk food, and I eat my fair share of kale, but I would be straight-up lying if I said I never had a sharp craving for the rich stuff - sugary, chocolaty, richy rich, ooey gooey, yummy stuff. Yeah, you know what I'm talkin' about!

Luckily, thanks to the absolute necessity of learning to cook if you want to be a healthy vegan, I can make my own versions of just about anything I'm craving. That's where this li'l awesome recipe comes in.

My six-year-old daughter, Lila, wanted ice cream with chocolate syrup. (She has two boxes of Ruby's Rockets in the freezer, but - no! - it had to be ice cream.) We all know the frozen banana ice cream trick (if you don't know it, scroll down to the bottom of this post), and it always suffices. She loves the stuff. But what about the syrup? I could probably find something that's technically vegan at the grocery store, but I don't want my little toot gobbling up gallons of HFCS and artificial dyes. What to do? Keep reading and you'll find out...

Christine (1983)

Anybody remember the movie Christine? The book was by the great Stephen King, the movie by the equally great John Carpenter. If you've never seen it, it's honestly really good. And, like so few horror films from the 80s, it stands the test of time. If you have cable TV (I, myself, do not *sigh*) I'm sure you'll be able to catch it in October when AMC starts running horror films all month. I highly recommend that you DVR it. Also, the title character, Christine, is a car. Thus, the motor oil association.

And now, let's get to the chocolate syrup recipe... Nom nom nom.

Christine's Premium Motor Oil

1 cup non-dairy milk (I used almond milk)
1 cup sugar, or more to taste
1/2 cup unsweetened cocoa powder, sifted if lumpy
1/4 teaspoon salt
1 teaspoon vanilla
A few drops/squirts liquid stevia (optional)
  • Bring the milk to a gentle boil in a small saucepan, stirring frequently with a whisk. 
  • Add the sugar and whisk to dissolve.
  • Add the cocoa and salt. Whisk to mix. Reduce heat to medium-low. 
  • Let mixture simmer for a few minutes, stirring or whisking occasionally, until it starts to thicken a bit. It will thicken more as it cools.
  • Remove from heat and whisk in the vanilla.
  • Grab a spoon and try some. If it's not sweet enough, you can stir in a few drops of liquid stevia to pump it up.
  • Allow to cool before pouring on ice cream or stirring into milk. This stuff makes a fantastic glass of chocolate milk!!
  • Store in the refrigerator in an air-tight container.
Oh yeah, buddy! Banana ice cream with homemade chocolate syrup.
Life is gooooooooooood.

Side Note: We have begun homeschooling our daughter and this recipe was a fantastic cooking lesson for a six-year-old. It didn't have a lot of ingredients, but it did involve actual stove top cooking and mixing. She loved it!

Banana Ice Cream
If you've never made the banana ice cream, you must try it! It's so wonderful, and so insanely easy, you will never look back. Peel some bananas, break them up into two or three pieces and freeze them. When you're ready to make the ice cream, just toss the frozen bananas into a food processor and whirl until smooth - no sugar needed. My kid eats it right out of the processor tub and this is the reaction I get every time.

 A smile worth every dollop of ice cream dropped on the kitchen floor.

September 4, 2014

The Stuff

"Are you eating it? Or is it eating you?" 


Anyone remember The Stuff? It's a bit more obscure, I'll admit, but the message resounds still today that primarily greed rules our food supply. The basic premise is that some miners find this yogurt-y lookin' "stuff" bubbling up from the ground, they taste it and decide it's delicious, then it gets marketed to the general public, who become addicted to it, become zombies, and basically get eaten from the inside out by it, eventually dying. 

The Stuff (1985)
Now, tell me how creepily familiar this next part sounds...
So, once it's discovered that The Stuff is killing people, and John Q. Public has been warned to dispose of his stash, the food industry starts experimenting with using smaller amounts of The Stuff inside regular ice cream so that they can keep the buyers addicted,and keep making money on it, but hopefully not have the customers get eaten from the inside out, at least not fast enough to have The Stuff be blamed for it. 

MSG anyone? Processed meat, maybe? Trans fat, much?!

Now let me just step down off of my soap box, brush myself off and get composed...
Ah, there we go. Let's get down to my very edible, healthy, and non-addictive (at least not in the "bad" way) version of The Stuff.
The Stuff in the film is white, but who wants to eat white puddin', I ask you? So, mine is chocolate. I threw coconut shavings on top for some white effect. So there.


This is an even simpler version of the Vegan Chocolate Mousse we all know and love. You know, the one where you melt chocolate chips down and combine them with non-dairy milk and sugar and tofu. But, frankly, when I'm really craving chocolate, I'm also usually in a brain-state that dictates, "You are too tired and bitchy to wait for chocolate to melt!" That's where The Stuff comes in. It's just powdered cocoa, silken tofu (hell, I don't even drain it), your choice of liquid sweetener, and a touch of vanilla. And it's awesome! 

Try some!
You'll love it, pretty mama.

2 12.3-ounce boxes silken tofu
1/2 cup powdered cocoa
1/2 cup your choice liquid sweetener*, or more to taste
1 1/2 teaspoon vanilla extract
  • This could not be simpler. Put all of the ingredients in a food processor and whirl until it's smooth and creamy, stopping to scrape down the sides every now and then. Once it's creamy, give it a taste and add more sweetener if necessary. That's all there is to it.
  • *I used raw agave with a touch of liquid stevia, but maple syrup or homemade simple syrup (probably just about anything sweet and runny) works too.  
Please take care to tighten the lid on your food processor, or this might happen...


August 14, 2014

Apricot Coconut Oatmeal Clusters


You know how some people do some stuff to relief stress in their lives? Like, my husband loves to read boring philosophy books and write songs on his guitar. That's just how the guy unwinds. My neighbor is a gardener and a fairly hardcore churchgoer - that's what blows his hair back. You know what I mean? We all have that thing that we love to do, and it makes us feel really good, and without it we get really, really wound up. For me, it's baking. I mean, seriously, I freakin' love to bake! But I'm... well... what's the PC term for it... I'm - uh - differently weighted... I'm gravitationally challenged... You get me? I'm fat, people! I'm a fat herbivore. Yes, they do exist! And I don't have a problem with being fat. My husband thinks I'm sexy, so it really doesn't bother me too much, with the exception of the fact that I am forever destroying the poor underwires in my bras and my knees are begging for mercy 24/7. There's also the desire to live long enough to meet my grandchildren and to enjoy the twilight years of retirement, kickin' back on the shore outside my imaginary lake house. So! To that end, I am always trying to create baked goods that are at least moderately healthy, but definitely succulent. But not SO succulent that I eat forty at a sitting. To that end, I introduce my latest home-bakery creation, the Apricot Coconut Oatmeal Cluster. It was meant to be a cookie, but it came out more like a clustery thing, so there ya go. There's no oil or butter in it, and minimal sugar (compared to my standard baked fare), plus it's jam-packed with fiber, so it's a win-win! Give these li'l cuties a try. You'll love 'em and you don't even have to feel guilty about eating them.


1 ripe banana, mashed with a fork
1/4 cup unsweetened applesauce
1/2 cup sugar
1/4 cup liquid sweetener (I used agave, but maple syrup'd work)
2 tablespoons almond milk
1 teaspoon vanilla extract
1 1/2 cup rolled oats
1/2 cup whole wheat flour
1/4 teaspoon baking soda
1/4 teaspoon ground cinnamon
Dash of nutmeg
1/2 to 1 cup dried apricots, coarsely chopped
1/4 to 1/2 cup unsweetened coconut flakes*
  • Preheat oven to 350 degrees F.
  • Spray a large cookie sheet with baking spray, or use parchment paper or a SilPat.
  • Mix the banana, applesauce, sugar, liquid sweetener, milk and vanilla together in a large bowl. 
  • On top of the wet mixture, gently add the dry ingredients, but do not stir until you have everything added.
  • Stir gently until just mixed.
  • Gently fold in the apricots and coconut flakes. 
  • *Side Note: I used organic unsweetened coconut flakes, which is what you see in the picture, not standard shredded coconut. But I think you could just about use anything in these clusters and it would taste nice. For example, you could eliminate the cinnamon and nutmeg and throw in some dark chocolate chips in place of the coconut. Or some nuts! Feel free to play around with the recipe and share your results in the comments.
  • Drop by rounded teaspoon onto cookie sheet (I used a small cookie scoop).
  • Bake for 15 minutes.
  • Enjoy with an ice cold glass of almond milk or a cup of hot Earl Grey tea. Delicious!

June 4, 2013

Low-Guilt Chocolate Chip Cookies


Please take heed that I titled these cookies "low guilt," not "NO guilt." So, yes, there is a small amount of guilt involved with the consuming of these cookies, but I just love eating cookies so much, I will accept an extra dimple or two on my butt as a token of my affection for this confection.

I do still love whipping up Dreena Burton's yummy Homestyle Chocolate Chip Cookies when I can, but my pocketbook does not often allow the purchase of maple syrup. Seriously, why is that stuff so expensive?!
So, I took the liberty of altering Isa Chandra's Chocolate Chip Cookie Recipe from the Post Punk Kitchen and tried to make it just a smidge healthier, albeit not totally guilt-free.

I replaced half of the oil with unsweetened applesauce, left out the milk entirely, subbed potato starch for tapioca starch (because it's cheaper), subbed whole wheat pastry flour for the dastardly white stuff, and added in an extra quarter cup of chocolate chips (because I flippin' love chocolate).
The verdict? Slightly less evil, but just evil enough to taste amazing. The family went nutso for these, and my husband was shocked that I'd removed an entire 1/3 cup of oil. He said he couldn't tell the difference at all between these and the wonderful Isa Chandra recipe I've been making for years.
Give these a try and let me know what you think!

1/2 cup brown sugar
1/4 cup granulated sugar
1/3 cup unsweetened applesauce
1/3 cup canola oil
2 tablespoons potato starch (this sounds weird, but I promise it's cheap and easy to find)
2 teaspoons vanilla extract
1 1/2 cups whole wheat pastry flour (can sub white flour)
1/2 teaspoon baking soda
1/2 teaspoon salt
1 cup semisweet chocolate chips
  • Preheat oven to 350 degrees, and lightly oil two large cookie sheets. In lieu of oil or baking spray, a Silpat works well for these cookies if you have one.
  • Mix together the sugars, applesauce, oil, starch, and vanilla until smooth and creamy. 
  • Add flour, soda, and salt. Stir until well-incorporated and smooth, but take care not to overmix or your cookies will lose that crunchy-on-the-outside-soft-on-the-inside magic that makes them so good.
  • Fold in the chocolate chips.
  • Use a Small Cookie Scoop to scoop out your dough. Place 16 dough balls on each cookie sheet, and bake for 9 minutes. Watch the cookies closely during that last minute, to make sure they aren't getting too overdone.
  • They will be puffy when you pull them out of the oven, but as they cool, they will flatten and crisp to perfection.
  • Enjoy!
CLICK/SHOP/SUPPORT

June 2, 2013

I Can Finally Eat Basil. Life is Good.

Look at those lovely, waxy leaves. They smell and taste as good as they look!
I have been waiting patiently for weeks and weeks to eat the fresh basil I planted in my garden. The crazy-deliciousness of fresh basil is just beyond compare. I've been regularly sniffing the leaves (I admit, I am a chronic leaf sniffer), my mouth watering, just hankerin' for the time I could snip off a few and put them on something - anything - edible, to throw it's flavor profile right out of the ballpark. Normally, my thoughts might hint toward spaghetti or whatever is saucy and of the Italian variety. But it's already blistering hot here in North Texas, so I'm trying to use the oven as little as possible.


Instead, I found some gorgeous tomatoes at Aldi, for super cheap. Big flavorful fatties in a four-pack, for a buck and some change. So, I sliced them up, spritzed them with a generous helping of balsamic vinegar, put a fresh basil leaf on each one, then topped them with a slice of cucumber and some black pepper. They were AMAZING! Light and full of the fresh flavors of summer. I am planning to serve these at every dinner party I throw from now until the end of time. Give it a try!

P.S. If you're not already growing your own basil, it's not too late!
Here's a great website with all the info you need to get growing.
http://www.growing-basil.org/

CLICK/SHOP/SUPPORT

May 19, 2013

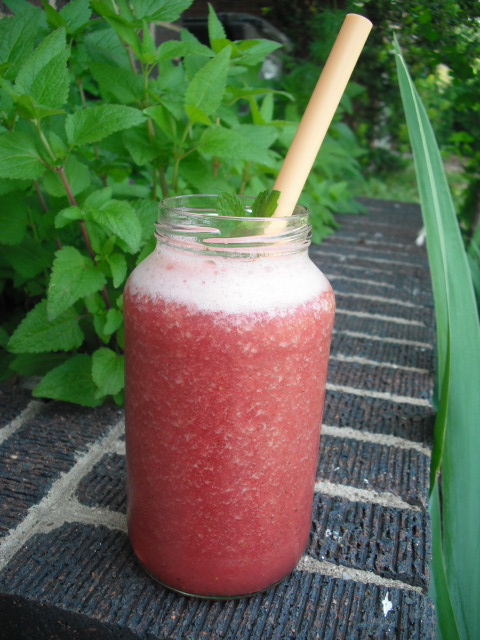
Watermelon-Berry Summer Sipper


It's not even June yet, and we're already climbing up into the 90s here in the Lone Star State. We've gotten out the blow-up pool, strung up the hammock, and started hoarding ice cubes in preparation for another long, hot Texas summer.

Here in Texas, we like to say...

"It's hotter than a billy goat in a pepper patch!"
"It's so hot the hens are layin' hard-boiled eggs!"
"It's so hot I used my seatbelt buckle as a brandin' iron!"
"It's hotter than a preacher's knee!"
"It's hotter than whoopie in woolens!"
"It's hotter than a burnin' stump!"

This explains why I'm inside my nice, cool house sippin' on my Watermelon-Strawberry Summer Sipper while the husband and kid splash in the pool. Don't judge me - I took some Sippers out to them too. But I'm stayin' right where I'm at, watching the flowers grow through my window panes, while the ceiling fan laps my bangs. Ahhhhhhhhh, summer in Texas...

Flesh of half a baby, seedless watermelon (volleyball-sized)
Half a peeled cucumber
8 to 10 large strawberries
8 to 12 large fresh mint leaves (you should grow this - it's so easy!)
Between 0 (if you're good) and 3 (if you have a kid) Tbsp sugar
About 8 to 10 ice cubes

  • Put all of the fresh stuff into your blender, then just top it off with as many ice cubes as you can fit.  
  • Whirl away!
  • Enjoy.

YUMMMMMMMMM...

CLICK/SHOP/SUPPORT

April 17, 2013

"AwesomeSauce" Even Omnis Will Love


My favorite vegan restaurant, Spiral Diner Fort Worth, makes an amazing nacho dish with what seems to be the latest sensation, a vegan "cheesy" sauce made from cashews. I love these nachos super hard. They are mouthwatering and fantastic. I even eat the jalapeno slices on top, because there's the microscopic possibility that they might be ever-so-slightly impregnated with the sauce. The only problem is that, despite their fantastic food and friendly waitstaff, Spiral Diner has one slight imperfection... It's expensive! And I'm eternally broke! To be fair, they do charge a decent price considering that the bulk of their foodstuff is organic. And, if I could afford it, I would not feel ripped off eating there every single day. Hell, every single MEAL if I could! But, sadly, my trips to Spiral happen only a handful of times per year. And I am forever trying to copy their recipes so that I can make their delicious yums at home for a fraction of the price. They do teach cooking classes on occasion, but I can't afford those either. What's a poor vegan to do??

Today I was really, desperately craving those nachos. Like, I mean, I had to have 'em, man! And I know the  not-so-secret ingredient in Spiral's "cheesy" sauce is cashews. But, since when can a poor person afford raw cashews? Since almost-never, that's when. So, I farted around with a couple of cashew-free "cheesy" sauce recipes I found online and came up with my own delicious chip-dipping substance, sans the expensive cashews. And it is fabulous!

Even your omni friends will love it. They won't have any idea it's vegan - it's way too decadent to be rabbit food! They'll think it's some exotic, richly creamy awesomesauce. Hence the name, "awesomesauce." I hope you enjoy it as much as I did!

1/2 cup nutritional yeast
1/4 cup whole wheat pastry flour (can sub all-purpose flour)
2 tablespoons cornstarch
1 teaspoon salt
1/2 teaspoon garlic powder
1/4 teaspoon turmeric (optional)
2 cups water
1 teaspoon mustard
  • Whisk all ingredients together in a medium saucepan.
  • Bring to a slight bubble, stirring constantly, over medium heat. 
  • As soon as mixture begins to bubble, reduce heat to low and continue whisking until sauce thickens. Sauce will continue to thicken as it cools, so be careful not to overcook.
  • Turn heat off and remove saucepan from heat source. Stir a few more times and serve. 
  • Enjoy!
P.S. AwesomeSauce can be stored in an airtight container in the fridge for a few days. To reheat, just add a tablespoon or two of water and stir gently over medium-low heat until warm.

CLICK/SHOP/SUPPORT